Bipedal Robot
A little while ago I saw a really cool project that got me really excited about microprocessors and tinkering with hardware. I’ve been aware of the Arduino project for a while but my limited grasp of resistors and capacitors was holding me back a little.
A couple of weeks ago I caved and bought myself a Genuino Uno and a basic starter kit from Amazon. Once I’d built a few of the tutorial circuits I started looking around for other projects to build; the Gamebuino project above is still a little beyond my skills but definitely something I want to work towards. Whilst looking around at the various things people do with their Arduinos I came across an awesome Quadruped robot and wondered how I might build one of my own. I kept browsing and found BoB the Biped. The cool thing about BoB is that he only needs 4 servos and I happened to already have 4 servos that I’d preserved from an RC plane I had as a really young kid! I (literally) dusted them off and hooked them up, one at a time, to my Uno with the Sweep tutorial loaded and was amazed when each of my 20-year-old servos worked flawlessly!
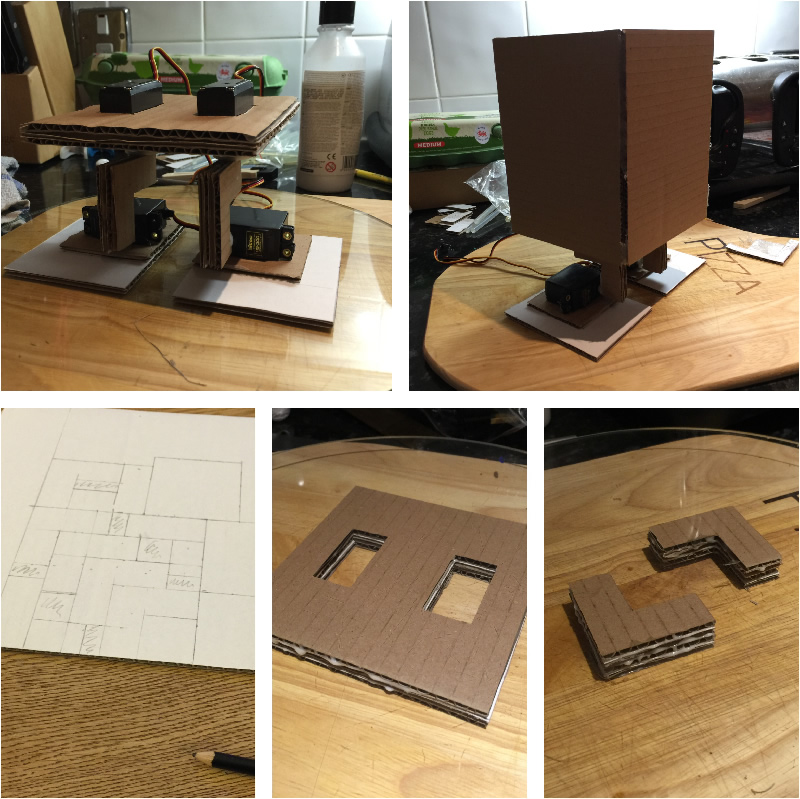
The instructables BoB is made from 3D printed parts, but I don’t have easy access to one of those, plus I wanted the option of maybe using it as a project with my students in the future so I decided to try building him from cardboard.
I stole a few unused packing boxes from a recent office move at work and set to work cutting and gluing the parts - shape was taken from the pictures with rough measurements that felt right at the time.
I worked on the legs first - I was a bit foolish to start with, cutting long pieces of cardboard, gluing together and then bending them to try to make the ‘L’ piece. These didn’t come close to bearing the weight of a single servo, let alone all the other stuff. I initially flirted with the idea of adding struts to add some extra support until I realised I was looking at it from the wrong angle. I cut 4 ‘L’ shaped pieces of cardboard and glued them all together to create a pretty sturdy leg. I used PVA glue to stick the layers together, which seems to actually add a bit of strength.
Next I measured out my servos and cut a ‘Pelvis’ with holes to drop them into. In an effort to save some weight (and drawing time!) I only cut 3 layers. I was pretty proud when the 3 sections were glued together and the servo cutouts matched within less than a millimetre!
I used a hot glue gun to glue the servos into the holes and the legs onto the servos.
Next I used the headers and some old protoboard I had laying around and soldered up a simple connector board that provided 6v of power using 4 NiMH AA cells. I used the same cells to power my Uno via the Vin connector and although 6v is a bit low for the voltage regulator according to the docs, it seems to work ok.
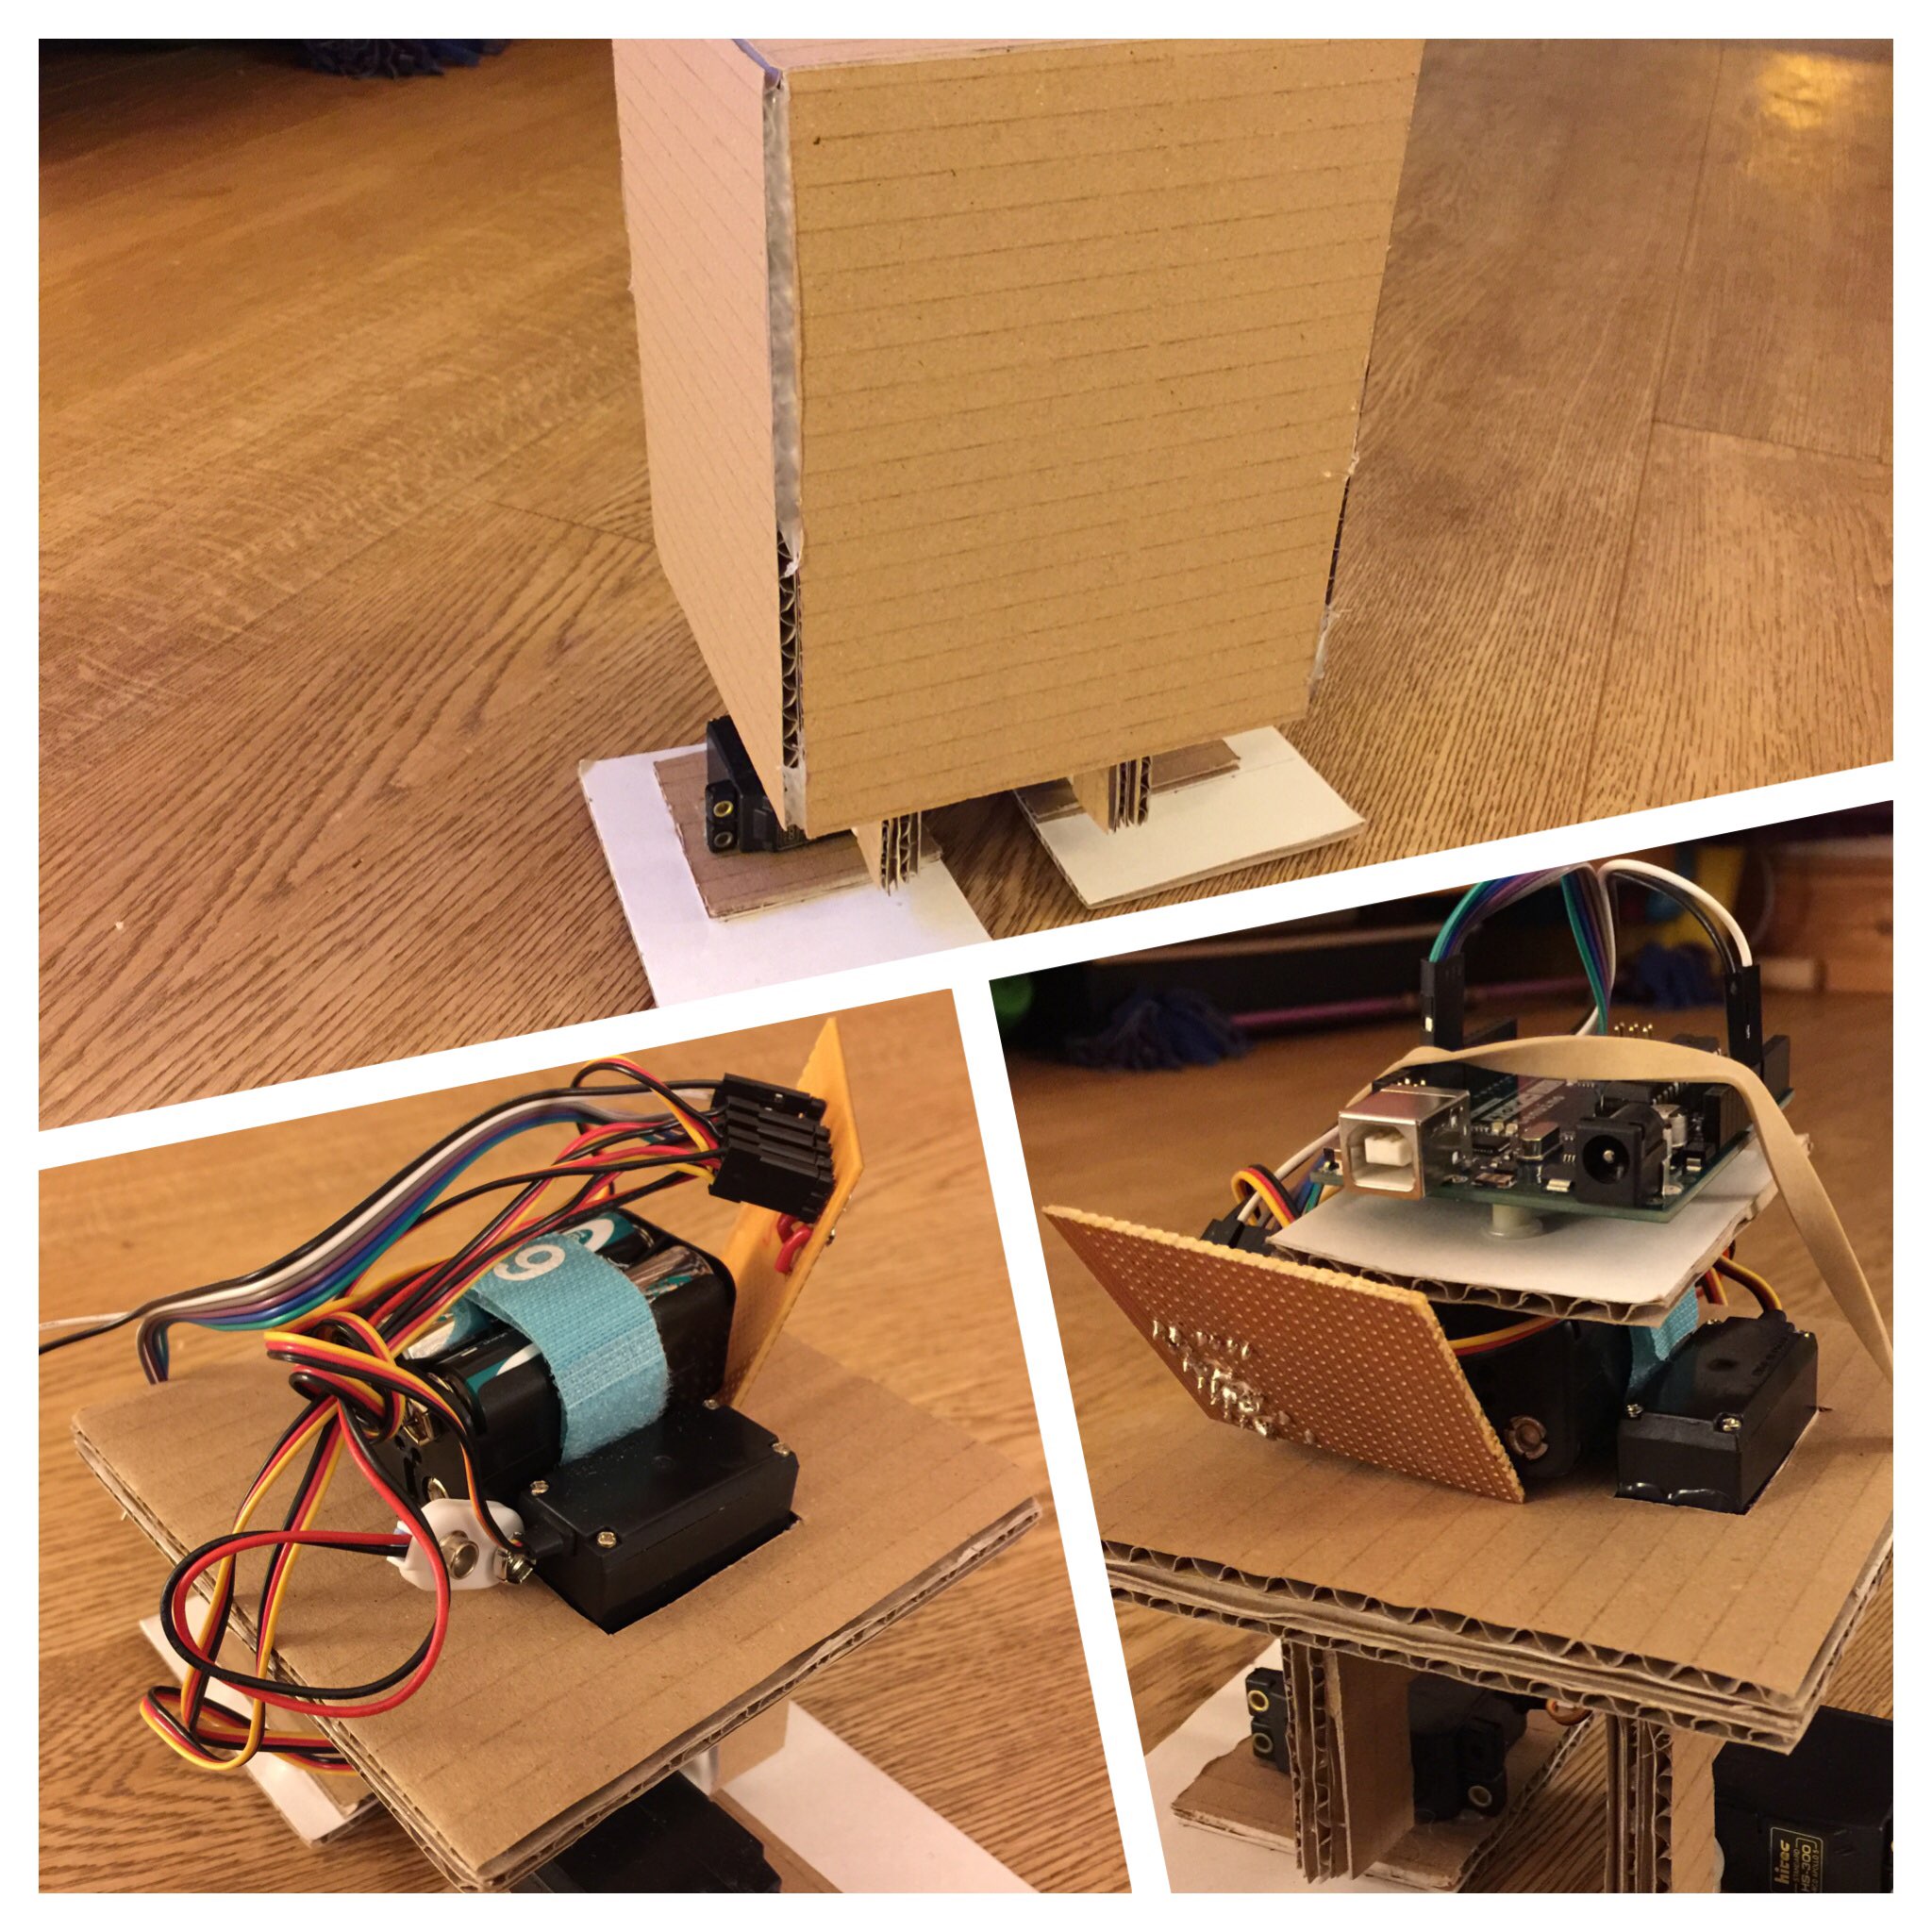
I made a cool head to cover it all by cutting carboard panels and hot-gluing them together. It’s a little rougher than I’d like but I’m going to add proximity sensors and other features later on, so I’ll likely build a new one to mount those into. I think this one was a little too tall as well, which caused a few balance problems.
Coding was next. I’ve been using a mixture of the official Arduino IDE and a web-based editor called codebender. I do intend to put my project code into GitHub, and I think codebender can interface with that but I need to investigate.
In the meantime, codebender lets you share code with a simple link, which is a little bit neater than pasting it all up in here:
After much fiddling with the various values, I ended up with a pretty effective walking gait, as evidenced in this awesome video:
Work still to do:
- Add sensors so it can avoid obstacles
- Add code to turn right, walk backwards & dance
- Add a 8x8 LED matrix to display a mouth
- Add sounds so convey emotions
I’ll probably write about some of those separately as I go.